(MTRL) Making a wooden USB drive

This is a draft of a blog post that I wrote for MTRL KYOTO. It doesn't go into much detail but I thought it was interesting enough to post here too.


Hi, I'm Connor, one of the directors here at MTRL KYOTO. Part of my job as director is making simple projects using our fabrication tools to serve as examples of things you can make here. So I'll be writing about some of those projects every now and then.

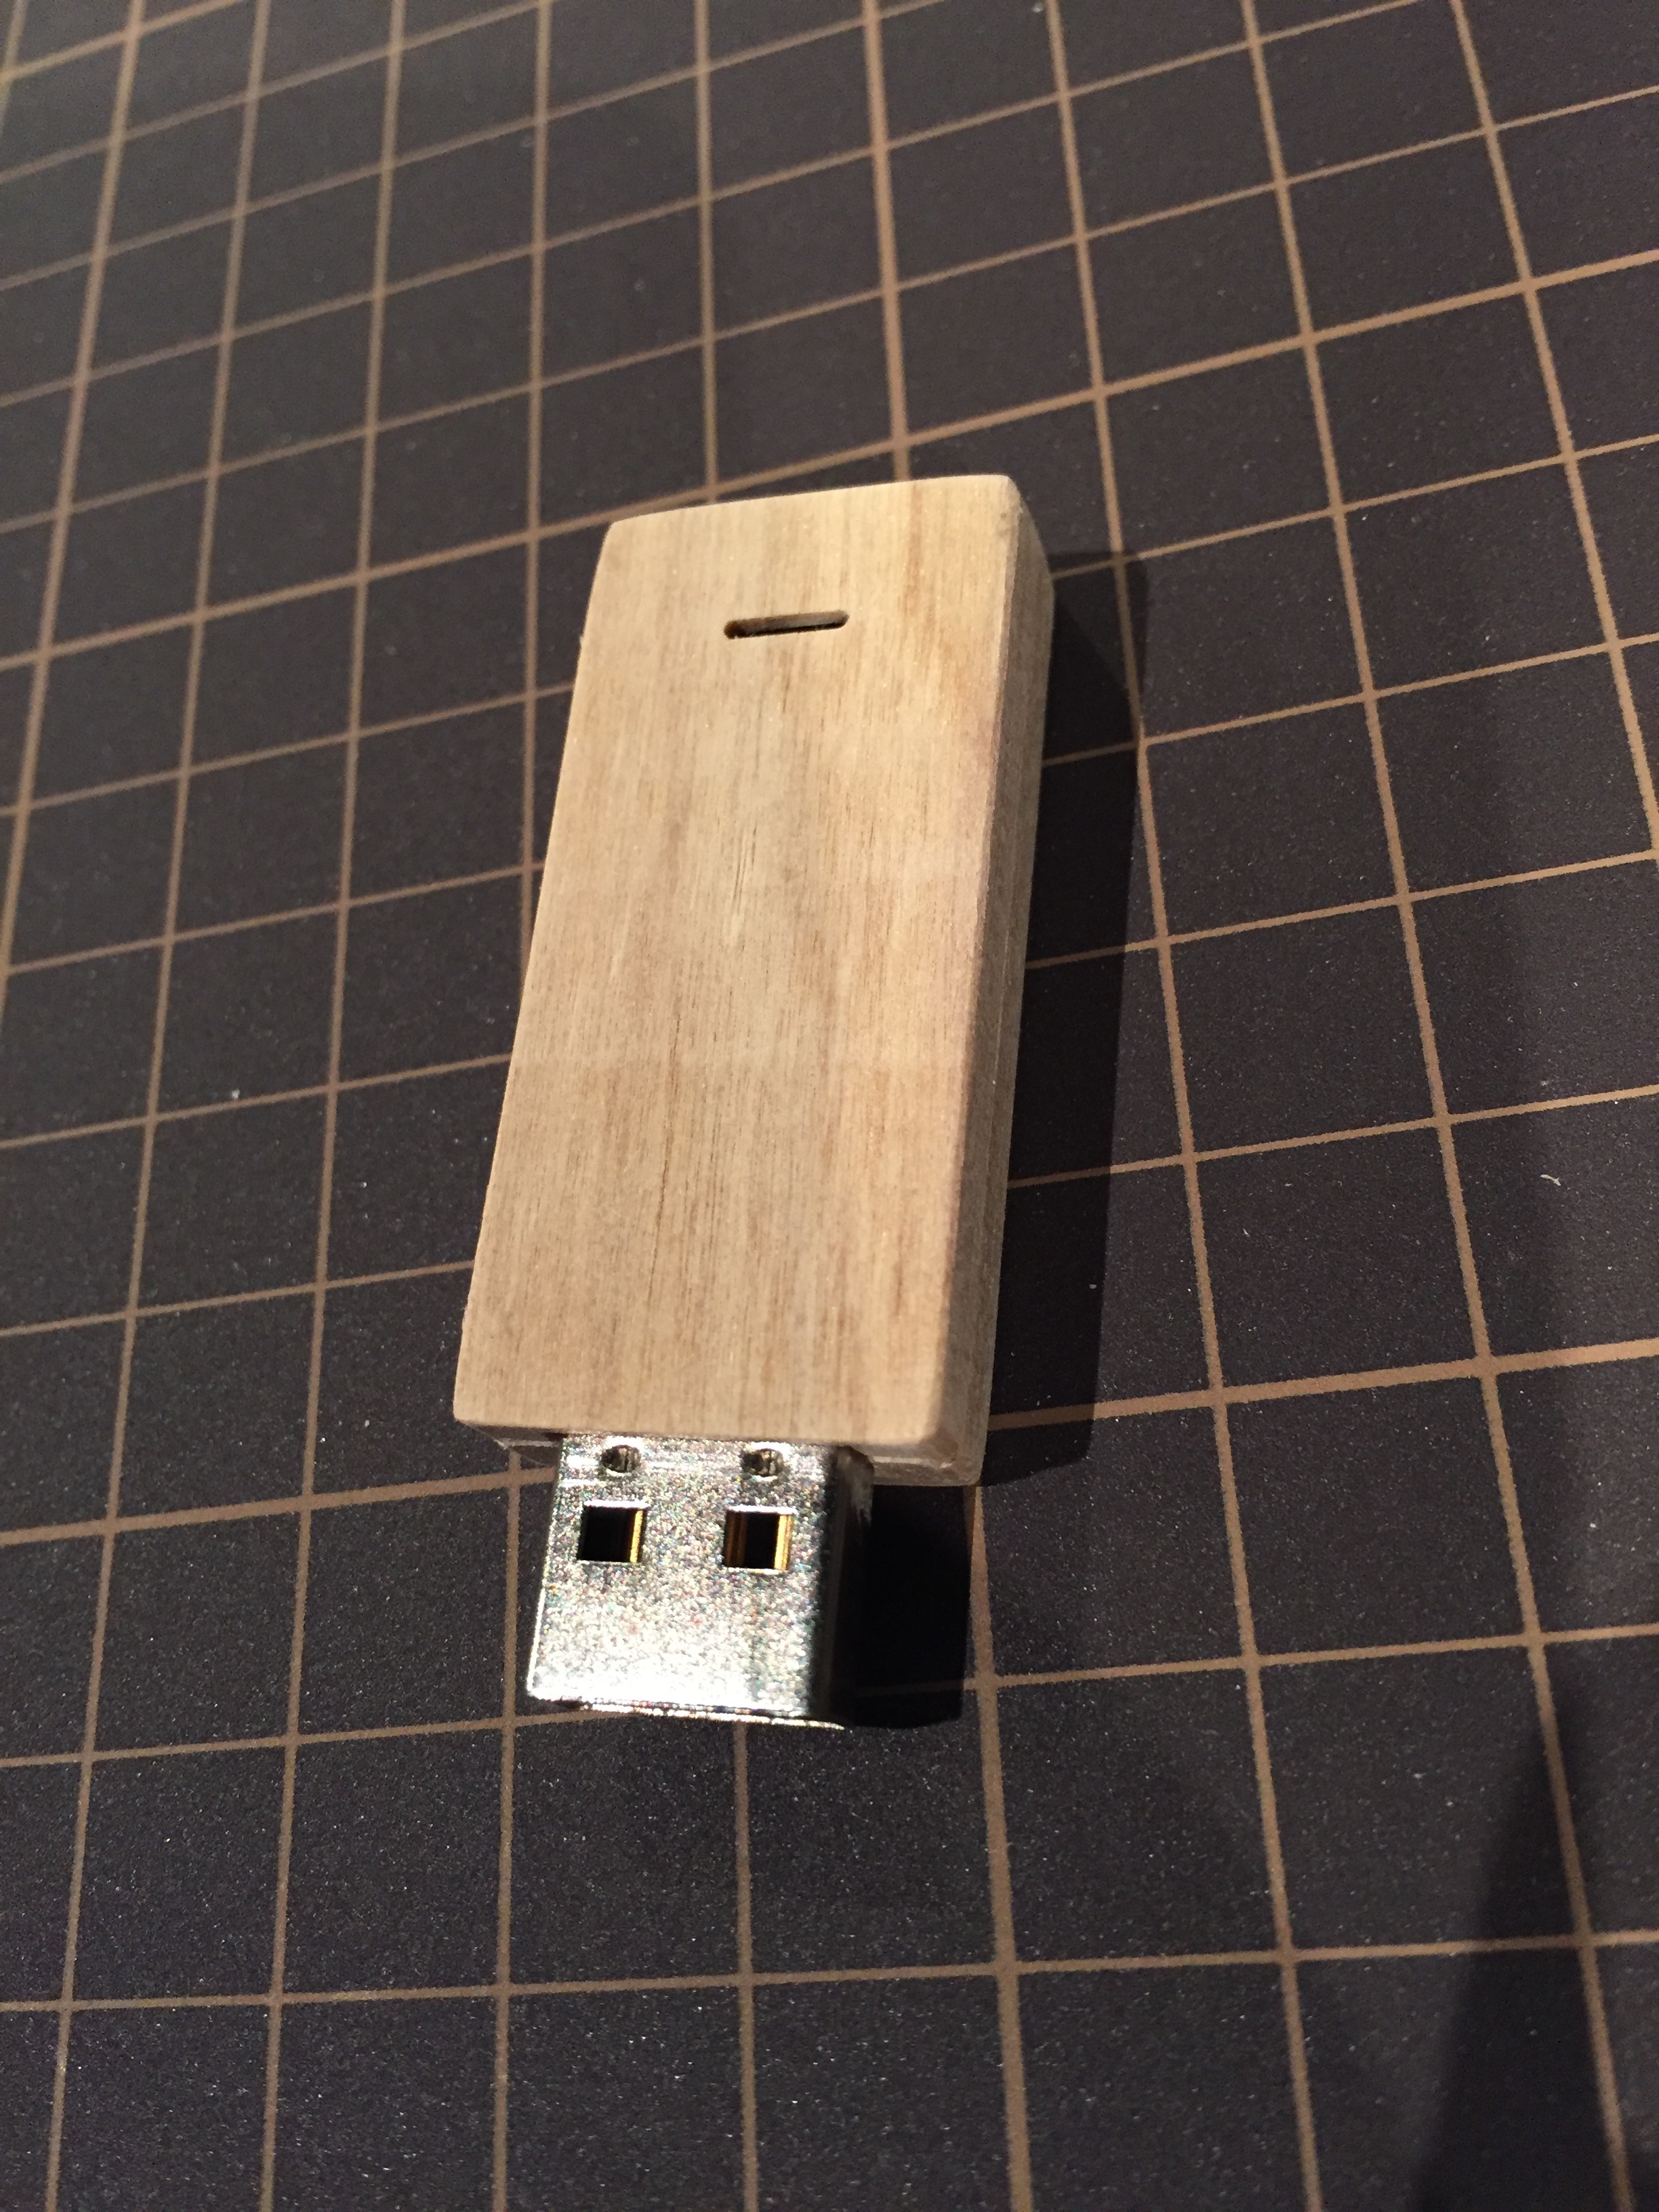
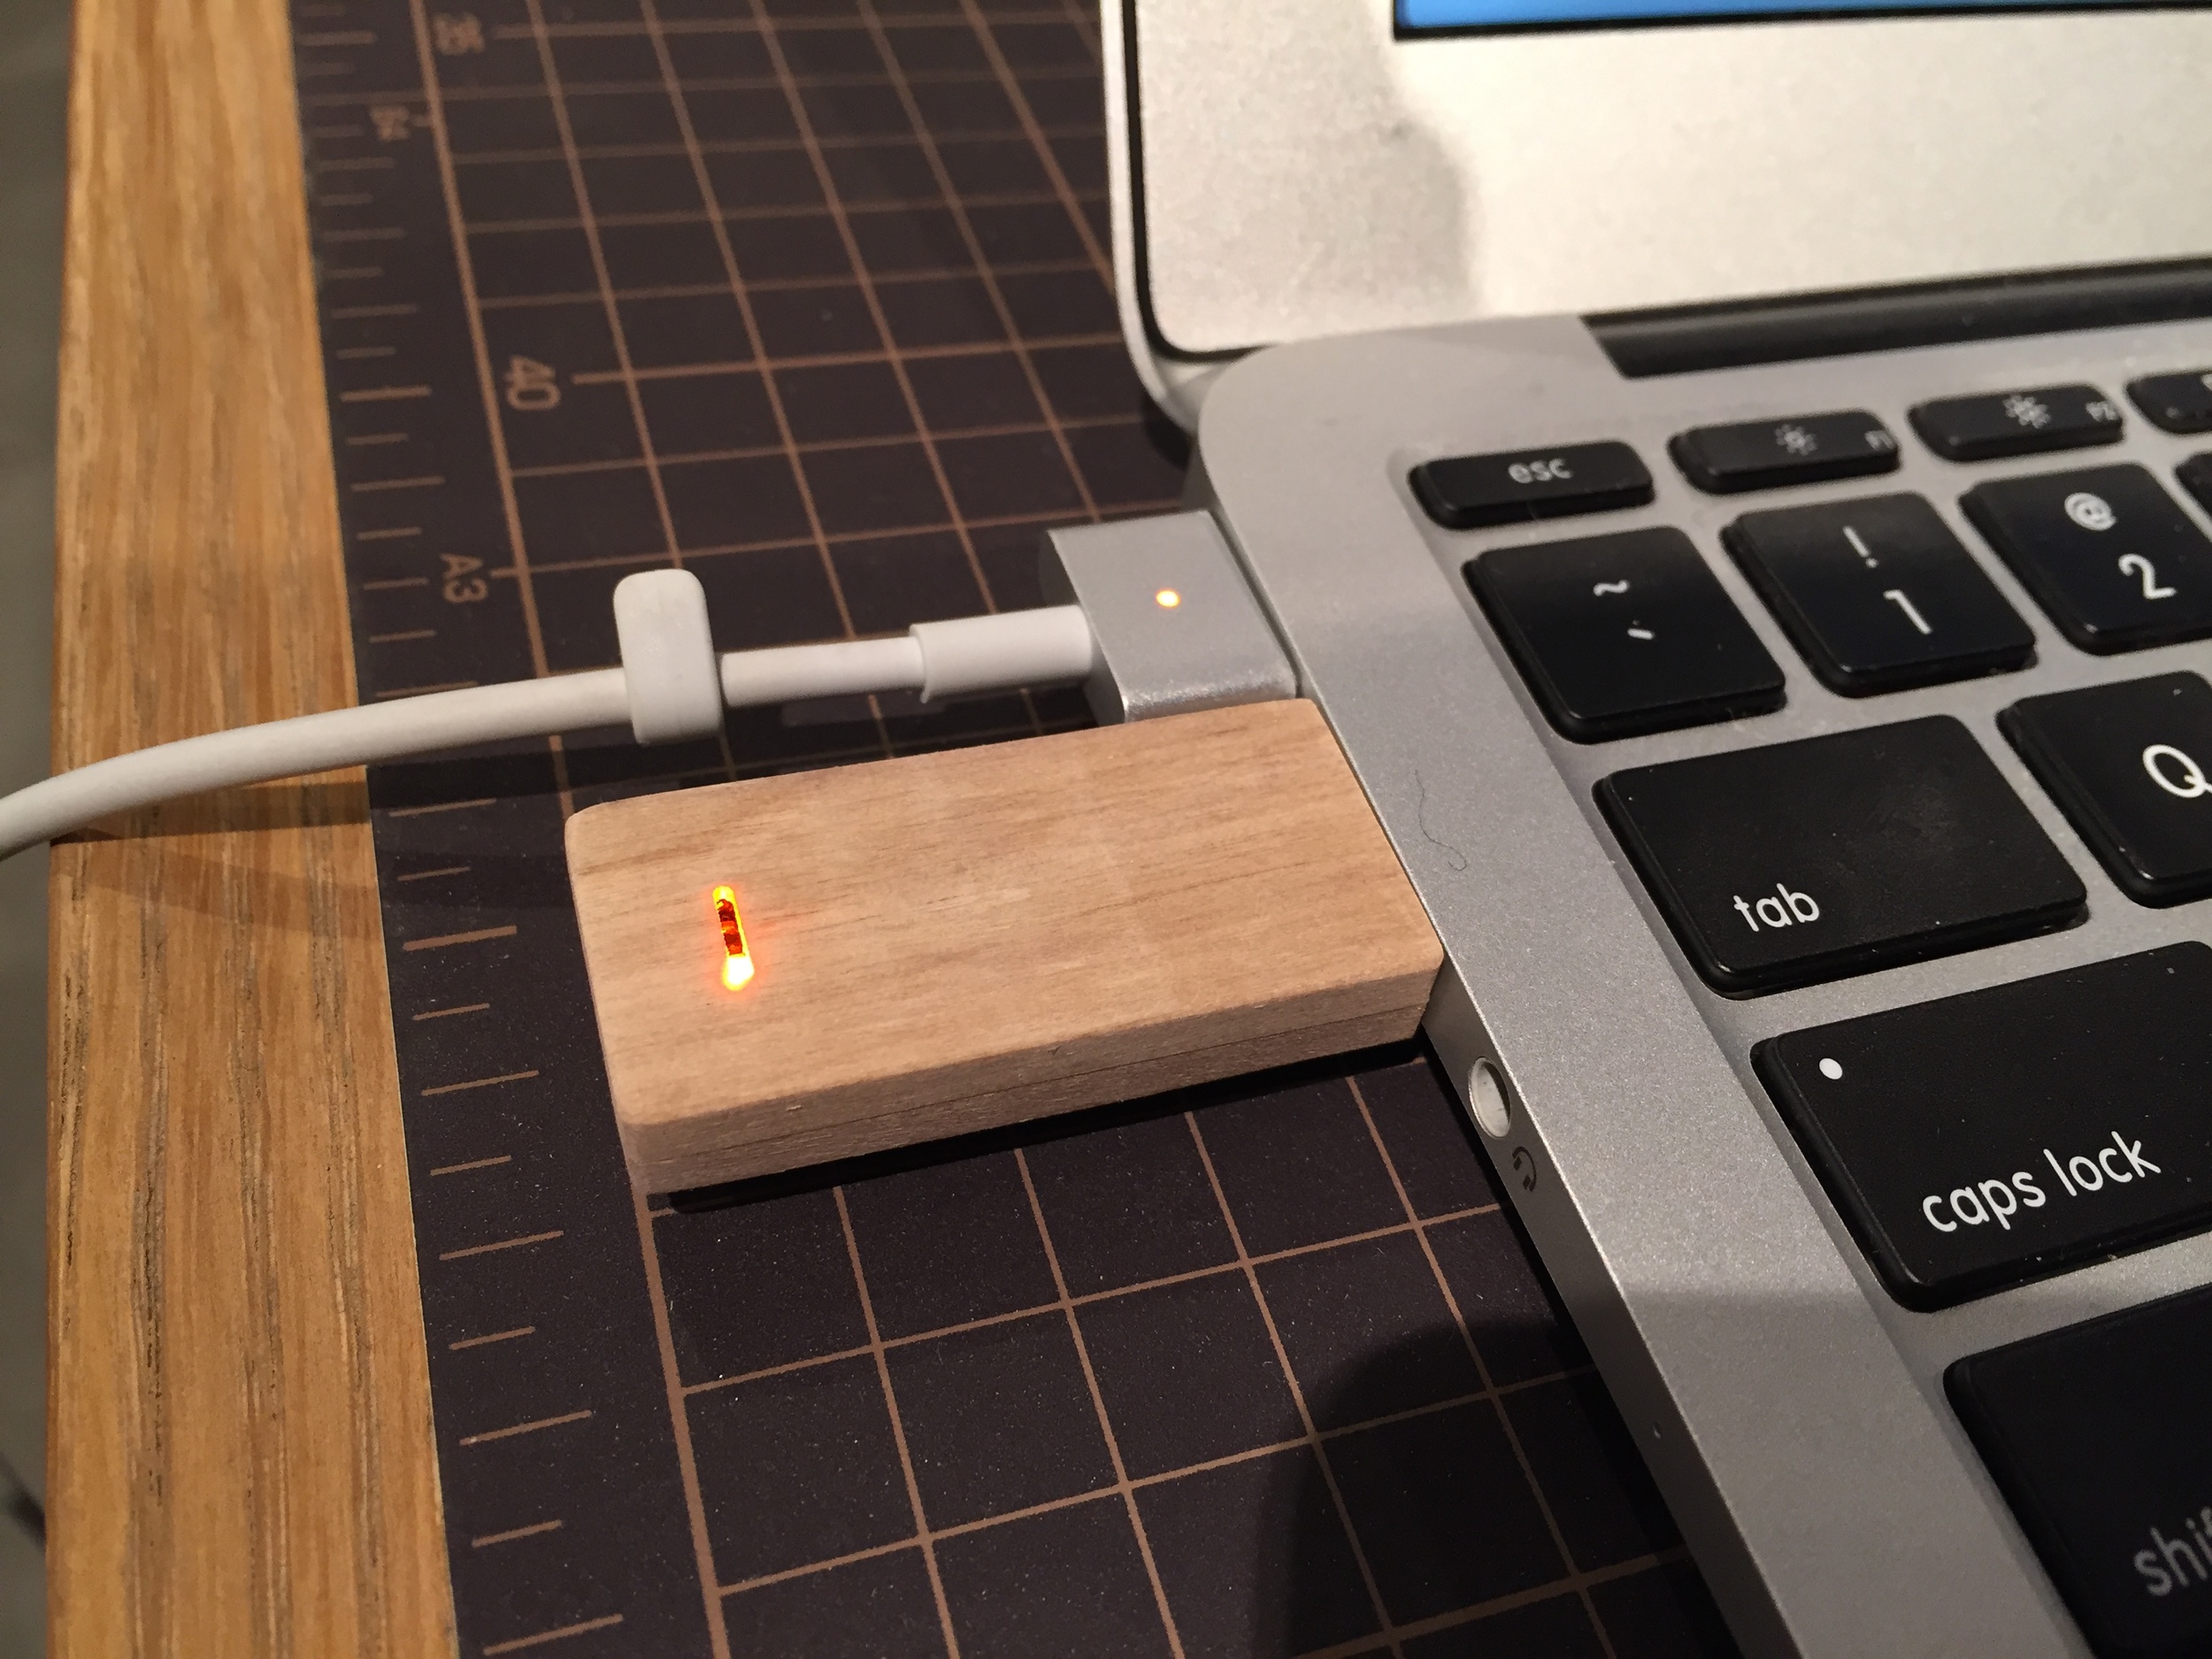
Today I want to share a little bit of the process of making this wooden USB drive.

The first step, as with any project, was to choose my materials and my tools. I knew that I wanted to use a piece of Japanese wood called Hoh that I had been saving for a couple months. The wood was pretty flat but too thick to use with the laser cutter, plus I wanted it to have a uniform look, not box jointed like laser cutter made enclosures, so I went with the CNC machine, a KitMill Qt100 from Original Mind, a Japanese mill manufacturer.

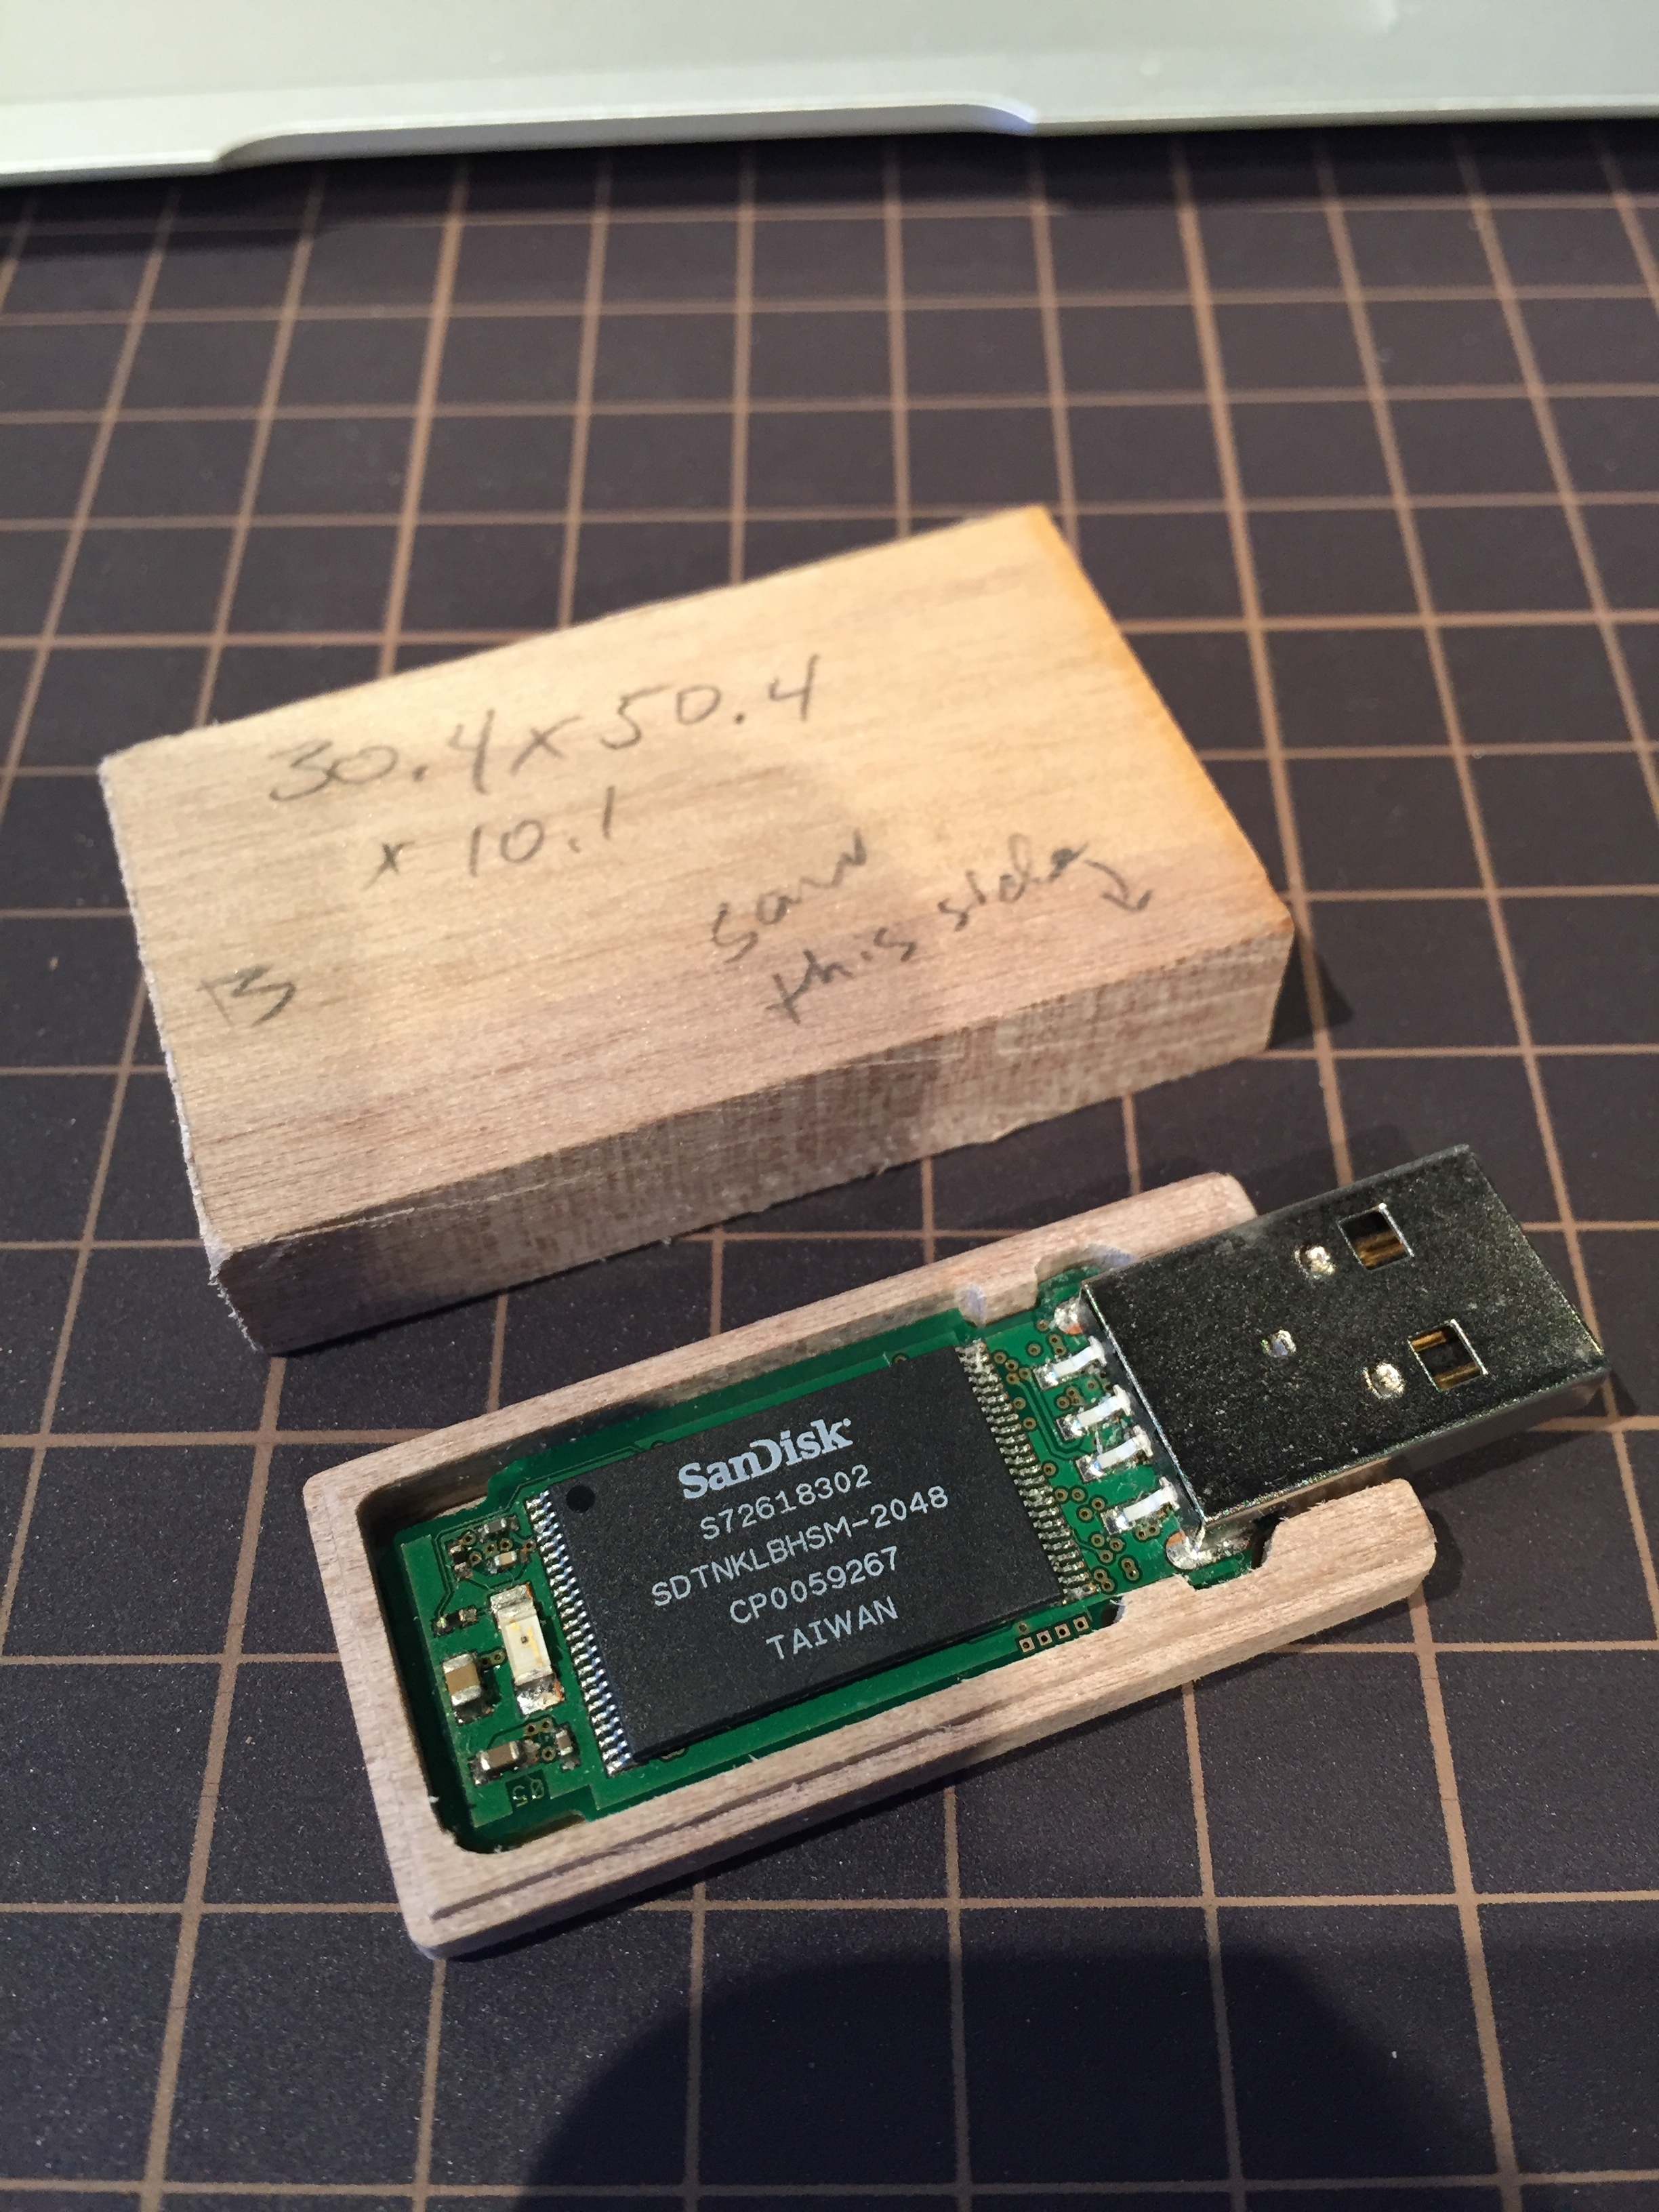
I jumped into Fusion 360 to start making my 3D model. First I broke off the old plastic case and modeled the insides of the USB drive. I then designed the enclosure around that so that it would fit snugly inside.

Next, using a handsaw I cut a couple of small blocks of wood, one for each half of the enclosure, measured both blocks and used those dimensions to start generating some toolpaths. Toolpaths are basically protocols that tell the CNC machine how to move, how fast to move, and what endmill to use. Once I finished my toolpaths and simulated them, I exported them as gcode. Gcode is basically just a long list of coordiates. Move left 2 mm, move back 1 mm, and so on. The CNC machine reads this list and follows the commands exactly.

Once I had my gcode exported and saved, I took it over to the CNC machine, loaded the file and pushed go. It took about 30 minutes total to finish both halves of the enclosure. The finished enclosure snapped together perfectly and held together even without glue, but just to be safe I attached them with a little glue and sanded everything nice and smooth. A few weeks later I picked up a nice piece of Japanese cherry and decided to make a new enclosure with a slightly harder wood. I think I prefer the cherry to the Hoh, but I've got a bunch of other types of wood I want to try so I might make a few different versions!


Compensating for laser cutter kerf

This is a long and very nerdy post about laser cutter kerf. Kerf is the amount of material that is removed or lost in the cutting process, and, if not compensated for in the design plans, will result in loose fitting parts.

I work at a digital fabrication co-working space called MTRL KYOTO where a big part of my job so far has been to familiarize myself with the tools we currently have on hand. So far I've been focusing mainly on working with the laser cutter, a RayJet. I made this sign for the coffee/bar area using 6 mm Shina plywood, and a little box to hold stickers using some sort of 1.5 mm plywood.

As a side note: I prefer the slightly thicker plywoods to the 1.5 mm stuff. They tend to stay perfectly flat, where as the thin stuff can warp a little, which causes the position of parts of the material to be out of alignment with the laser's focus.

I did a little reading about compensating for laser kerf when making parts that are supposed to fit together snugly. Some pages were saying that laser kerf, depending on the machine and the material, can range from .08 mm to .32 mm. In other places I read that the standard was .0254 mm, so I made some test parts with a .0254 mm compensation and they didn't fit at all. At first I started very gradually increasing the compensation, but after about 2 hours and parts still not fitting together, I started taking bigger steps up. For our machine, with the 1.5 mm ply, the optimal kerf compensation turned out to be exactly .1 mm. Once i settled on that number, parts started popping into place without having to force them, and they held together without any glue. Factoring in kerf compensation usually isn't too hard, but when you're laying out box joint teeth like on the little box above, it can be a little confusing. I made this diagram to illustrate.

(Edit: Shortly after writing this I discovered the offset feature in Illustrator, which made me feel incredibly stupid for having wasted so much time doing that manually...)

The tricky part is getting the teeth to each be 5.1 mm while making sure that the spacing between the teeth is still exactly 5 mm. I did this in Illustrator by first making rectangles the size I want them to eventually be, say 100 x 50 mm. Then I made a 5 x 1.5 mm rectangle (the width of the stock is 1.5 mm) which represented the size of the teeth I wanted. I then spaced the teeth along all sides of the inside of the rectangle. This gives me my correct spacing. Then I widened the big rectangle .1 mm in each direction. Then I made the "cut size" tooth, which was a 5.1 x 1.6 mm rectangle, and I spaced each of those along the outside of the big rectangle so that each "cut size" tooth was centered over the actual size teeth. This is kind of difficult to explain so I'll post some screen shots of the process.

So here is the basic shape of one side of the box. I put 5 x 1.5 mm spacers around the inside perimeter of the shape.

Next I enlarged the big rectangle by .2 mm in both width and length. .1 mm will be lost on each side so that's why I added .2 mm total. Be sure you are enlarging relative to the center of the object. You should have something that looks like this.

Then I made a rectangle that was 5.2 x 1.6 mm (+.2 in length but only +.1 in width because it's only being cut on one side) and copied that shape, each time lining it up to the center of the original spacers.

Once I got all the "cut size" teeth arranged, I deleted the spacers and combined the teeth with the big rectangle using the pathfinder tool so it's all one complete vector.

So with this method, once all your pieces are cut out they should fit snugly together. Every laser cutter is different though, so you'll want to do some tests to figure out what the optimal kerf compensation is for the machine you're using. 

Trip to Echizen

The other day I made a trip to a place I've wanted to go to for a long time, ever since I first printed on a silky smooth piece of washi (Japanese paper) made in Echizen, a small rural town in Fukui Prefecture, Japan. 

Echizen is famous for washi production, and the town is home to some famous paper makers including a few who have been designated as living national treasures by the government like Ichibei Iwano and his father.

iwano

The drive from Kyoto to Echizen took about two and half hours. My girlfriend and I took the road going along the west coast of Lake Biwa up to the northern coast of Japan. We drove through fishing villages and saw cargo ships. Then we worked our way northeast along the coast on roads that skirt the mountains dropping straight down into the sea. 

The town of Echizen itself is pretty much dead unfortunately. We drove through the empty streets in the downtown area where almost all the shops were closed. The Washi Village was only slightly more lively, with one group of old ladies taking a tour. We watched a demonstration of handmade washing being made and then chatted with the old man who made a few quick dirty jokes while sharing with us a little of the history and different types of washi. 

We checked out the washi museum which contained large sheets of about every type of washi that exists hanging from the ceiling. Another room had old paintings and prints done on washi and some antique tools donated by paper maker's families. We were the only people there. After that we took a walk through the neighborhood where paper makers have lived for many generations, and went to the local shrine to pray to the god of washi. In Japan there's a god for pretty much anything, but if you think about people 200 years ago, making washi was how they survived. It was the livelihood of their whole town, so building a shrine to say thanks seems natural.

Before we left we did the washi making experience, which wasn't very authentic because they use a vacuum thing that sucks all the water out of the paper so it dries in 5 minutes, but it was interesting and more difficult than I thought it would be. Then I bought a few sheets of washi from the store and we drove back to Kyoto mostly in the dark.

Japanese author pha's thoughts on marriage and family

Here are some candid thoughts from Japanese author pha on marriage and family. First, the original Japanese taken from pha's blog followed by my unofficial translation.

家族はシェアハウスの一種に過ぎない。子どもを作ることを絶対視しすぎるのは息苦しい。家族とか結婚を絶対視して苦しむ必要はない。人間が生きる道は他にもたくさんある。

でも、家族とか結婚とかはやっぱり便利で強力なシステムだし社会的にも優遇されてるので、それをうまく利用できるなら利用したらいい。だめだったら逃げてもいいけど。

使えるものは何でも利用して生きのびよう。
Family is nothing more than one variety of communal living. Thinking that having kids is an absolute truth is suffocating. There’s no need to continue suffering thinking that these things like marriage and having a family are absolute. There are plenty of other paths people can take.

However, marriage and family are convenient and are a powerful system that comes with societal approval, so if you can use that to your advantage, why not? If that doesn’t pan out though it’s ok to bail.

As humans we have to make use of whatever we can to survive.

Not to say that I share the same perspectives as pha; I just thought that was interesting. Living in Japan I find that people here often think about marriage and family in ways that can be difficult to understand for Americans/Westerners, myself included. 

pha is the author of several books including 「持たない幸福論」 and 「ニートの歩き方」which I would like to read.

Animated logo for Mackerel

I made this little animated logo for work. I might use it in the 1-minute promo video I'm working on for Mackerel. The actual logo was created by our designer Murata-san; I just did the animation in After Effects.

THE BRIDGE

Crowdfunding campaign underway for Kayac’s LED skirt that lights up your thighs

This is an article published a week or so ago by tech writer Yukari Mitsuhashi (@yukari77 on Twitter) that I translated from Japanese for a news source called THE BRIDGE. They report on new tech, startups, etc. in Asia and particularly in Japan. Translating this article was a lot of fun and I'm really looking forward to working together with everyone at THE BRIDGE! よろしくお願いします!

Using raw pigment (ganryo)

Last week I wrote about my first time making a hakobi, a brush made from bamboo sheath used to carry pigment to the block, so in keeping with the theme of traditional techniques in woodblock printmaking, this time I'll be talking about pigment (ganryo). Again, I'm following instructions written by David Bull, a well known printmaker in Tokyo (to whom I am truly grateful for sharing his knowledge in detail with the world).

First thing I did was hit a very old painter's supply store, the inside of which looked completely unchanged in over 100 years. I randomly picked 5 or so colors I liked and asked for 15 grams of each. Then I went back on a different day and got the main set of pigments discussed in David Bull's instructions which are:

  • gunjo (prussian blue)
  • hon yoko (a type of carmine)
  • shin seki ei (a basic yellow)
  • shu (vermillion)
  • ai-iro (indigo)

Note: I thought I could just ask the shopkeeper for each color by name, but actually there are many shades and varieties of gunjo, shu, ai-iro, and so on. In the case of ai-iro there were three shades: dark, medium, and light. I went with the medium, assuming that would be the "standard" ai-iro.

The price of pigments varies by color, some were ¥200, some were ¥400 (for 15g). The next step was to grind the pigment into a powder, because as you can see it's all clumpy. Once I had ground the pigment into a fairly fine powder, I started slowly incorporating a 50/50 mixture of alcohol and water until it turned into a paste with about the same consistency as toothpaste. 

For containers I used some little jars I found at a ¥100 store. Empty film containers work too. The hardest part about all this is actually cleaning the mortar in between colors, then cleaning the sink because all those pigments made it a vomity shade of grey-brown. 

In the next week hopefully I'll have a chance to take a few prints using these inks and see how they compare to out-of-the-tube watercolor or gouache.  

Hakobi

A hakobi is a traditional type of brush that's used in Japanese woodblock printmaking 「木版画」to apply pigment to the block. You can order these but they're not too hard to make and the materials are super inexpensive. All you need is wooden chopsticks, string, bamboo sheath, and some tools. I made this hakobi following instructions from Tokyo based woodblock printmaker David Bull. Here's how mine came out:
 

hakobi

Not bad for a first try. It took longer than I expected to separate the bamboo sheath fibers, I was probably banging that thing with a hammer for 30 minutes or more. It also made a mess in my kitchen, so maybe next time I make one of these I'll do it outside. 

DIY air conditioner

It's starting to get hot in Kyoto, especially upstairs in my house, so my girlfriend has been telling me we should buy an air conditioner, but those are on average $400 to $700 and drink a lot of electricity. I remembered once seeing a DIY air conditioner on reddit once, so today I went to a "home center" and got a few things: a bucket (was looking for a styrofoam cooler but they didn't have any), some PVC elbows, and a small fan. Here's the build:

That's it! Total cost of materials including the fan: about $30! And it will use way less electricity than a regular air conditioner.